Saturday, March 31, 2012

It's here, my baby is here!

In its little box from the mailman, left on my porch this afternoon!
Oh no! Packing peanuts! My least favorite thing to deal with!
Here it is in its little case, ready for me to unwrap and see what is inside
Oh my gosh, it actually works! The light lights, and the motor runs, and the needle goes up and down! Hopefully when I figure out how to thread it, it will actually sew! Can't wait to play!

It is a small dream come true (that lottery thing didn't exactly work out for me, although I did win $2!) But for a long time, I've wanted a Featherweight, made by Singer in the '20-'50s. They must have been prolific because they aren't rare, but are sought after because they are small, light and sew great. My aunt had one and swore by it, over and over, and over, and over! We tuned her out once she got on that roll, because she wasn't about to give it up to any of us, so it was a moot point, she loved it and we had to be jealous of it!

So, lately, I've been thinking about somehow acquiring one. I've toyed with the idea off and one lately, more for the sake of saying "I have a Featherweight and it sews so wonderfully!" I hope this lives up to the hype!

About a year and a half ago, I was taking a sewing lesson at my shop where I have bought my Janome machines. An older couple came in, carrying a little sewing machine in a small case. They said something to the effect that they didn't know if this was worth anything, maybe they would like to trade it for something newer, but only if it couldn't be fixed. The sewing teacher and I were like vultures hovering over it, wanting to say--""No, don't waste your money having it fixed, you would like a nice new shiny machine wouldn't you? And then we would try to snag the Featherweight from the dealer! Alas, the couple decided to have it repaired, and didn't trade it. That got my Featherweight juices flowing even more rapidly!

For those who are in the know, this has serial # AE082451. I know you can find out when they were made by the serial number, and one of my forum friends said she would do that for me. So, Bubby, let me know. I'm curious, but it isn't vital for me to know, just know that it works and sews nice, and it is sooooo cute, isn't it?

Wednesday, March 28, 2012

Vintage Sewing Machine

Here it is. Something I've been wanting for a long time! A Singer Featherweight vintage sewing machine. All the quilting divas have at least one! I found this on eBay. It's on its way to my house. I hope it works. But if not, they are infinitely repairable, so many of them are still around. Why some people even pimp them up by painting them wild colors!

Tuesday, March 27, 2012

Plenty of time to spare!

Last summer on the parking lot of Hancock Fabrics, I was approached by a friend who directs shows. She asked me to costume "Exit the King". I sort of forgot about that discussion until a couple of months ago, when she approached me in earnest, and pinned me down to costume her show. She had cast the show, and two of my friends were in it. It is a small show, with a cast of 6, so it wouldn't be a huge job. I reluctantly agreed, because I told another friend I would costume her show, and they are at the same time.

So, I was gathering materials, knowing that this show didn't open until April 13. I had a couple of costumes to build, but was taking my sweet time getting rolling on making them.

Then she told me last Wednesday that they needed as many as they could muster up for a publicity photo shoot tonight! That lit a fire under me, but my built in "timing thing" for just how long I'll need to finish it kicked in. I got a black skirt for the maid done, and we had the other maid accouterments, apron, cap, and she had the blouse that would work.

I didn't really get much accomplished this weekend, but started in earnest on the queens outfit on Sunday evening. Finished it and the blouse on Monday morning, then the skirt Monday evening. That left the king's silk pajamas that needed to be done for the photo shoot. We had back-up pajamas, but I did want to get them done if possible. The only time left to work on them was this afternoon.

When I came home from work, I was very tired, as usual. I thought, I'll just take a little cat nap then start on the pajamas. My cat nap lasted until 3, when I bounced up, figured I'd better start on those pajamas if I had any prayer of getting them done by 7 p.m. Lady luck was with me,, because I started at 3 and finished at 6:05.

As I was starting this last project, looked at my measurement book, and all it said for the king was L. So I made some L pajamas, which are really too big for him. But, if I am going to alter things, I'd rather make them smaller than try to make them bigger! I can take them in and make them fit him better.

Here they are:


My one friend in the grey coat did her own costume. She is a costumer extraordinaire, I learn so much from what she does. The maid forgot to bring her black blouse, the young queen forgot her corset, all because the director forgot to tell them that tonight they were going to be in pictures! Grrrrr!

Anyway, with all my procrastination and lack of motivation to do this, I got it done with time to spare! I even got to eat dinner (drive through McDonalds)! I got to the theatre at 6:49, photo shoot didn't start til 7! Plenty of time to spare!

Saturday, March 24, 2012

Daddy Dogwood

I've been a stalker during the past week. I've been driving by my old house and stalking the dogwood tree growing in the yard. You see, my late husband Ed, planted this tree in 1968 when we moved into this house. It was a little pencil sized stem when he planted it. Now, 44 years later, it still blooms in glorious white every spring!
This is how it looked earlier this week, not quite as white. The dogwood blossoms are actually bracts, they surround the flower, which is in the center. As the sun bleaches the bracts, they turn from green to white. I was trying to catch the tree in its whitest glory, I think I hit it today.


I have related the story about Ed and the dogwood trees in an earlier post (Down the Dogwood Trail). As it nears the anniversary of his birth, March 27, we think of him more. There is no better way to remember him than to look at this tree, that still survives after all these years, as a testament to his love for this type of tree, and as a testament of our love for him.

When we designed his headstone, we put dogwood flowers on it, instead of other flowers. I know he would love that.

P.S. in the second picture, you can see a huge bush that covers the entire corner of the house. This was a $.50 half dead Rhodedendron that Ed bought and planted. It will be flowering in glorious purple in a couple of weeks. I'm so glad the current owners haven't chopped these two trees down.

Friday, March 23, 2012

Pillow-pallooza

One of the newest YouTube tutorials is done by Jenny Doan and Vanessa of V and Co. Vanessa loves the new look of pleats, or in the fashion world, they are called shutters. So many dresses today are made of fabrics with the "shutter" overlay on the skirts and bodices, they are very slimming and quite popular. I have a dress made this way, and I love it.

Vanessa showed a tutorial about a month ago of a reverse applique pillow which she created by overlaying folded strips of cloth and sewing them to an underlayment, then appliquing a heart shape over the pleats to made a darling heart pillow. If this doesn't make sense, you will have to look for her tutorial, because it is very hard to explain.

For this tutorial, she just did the pleats without the applique to make a very chic pillow. Choice of fabric can make it look sleek and modern (Vanessa did hers in shades of light to dark grey to black--a very contemporary look), and on the Moda Bake Shop website, they show the same type of pillow using prints. The choice of fabic makes the style of the pillow change dramatically.


You know me, I like color, so I had to try this newest tutorial myself. I had pretty many jelly roll strips (2-1/2" wide) left from several of my recent projects. I started out with the Dogwood Trail jelly roll strips, since they were on top of the scrap heap. Then I dug further and made two more pillows! I guess this is why I named this post PILLOW-PALLOOZA! Because now I have three new and very pretty pillows for my home.

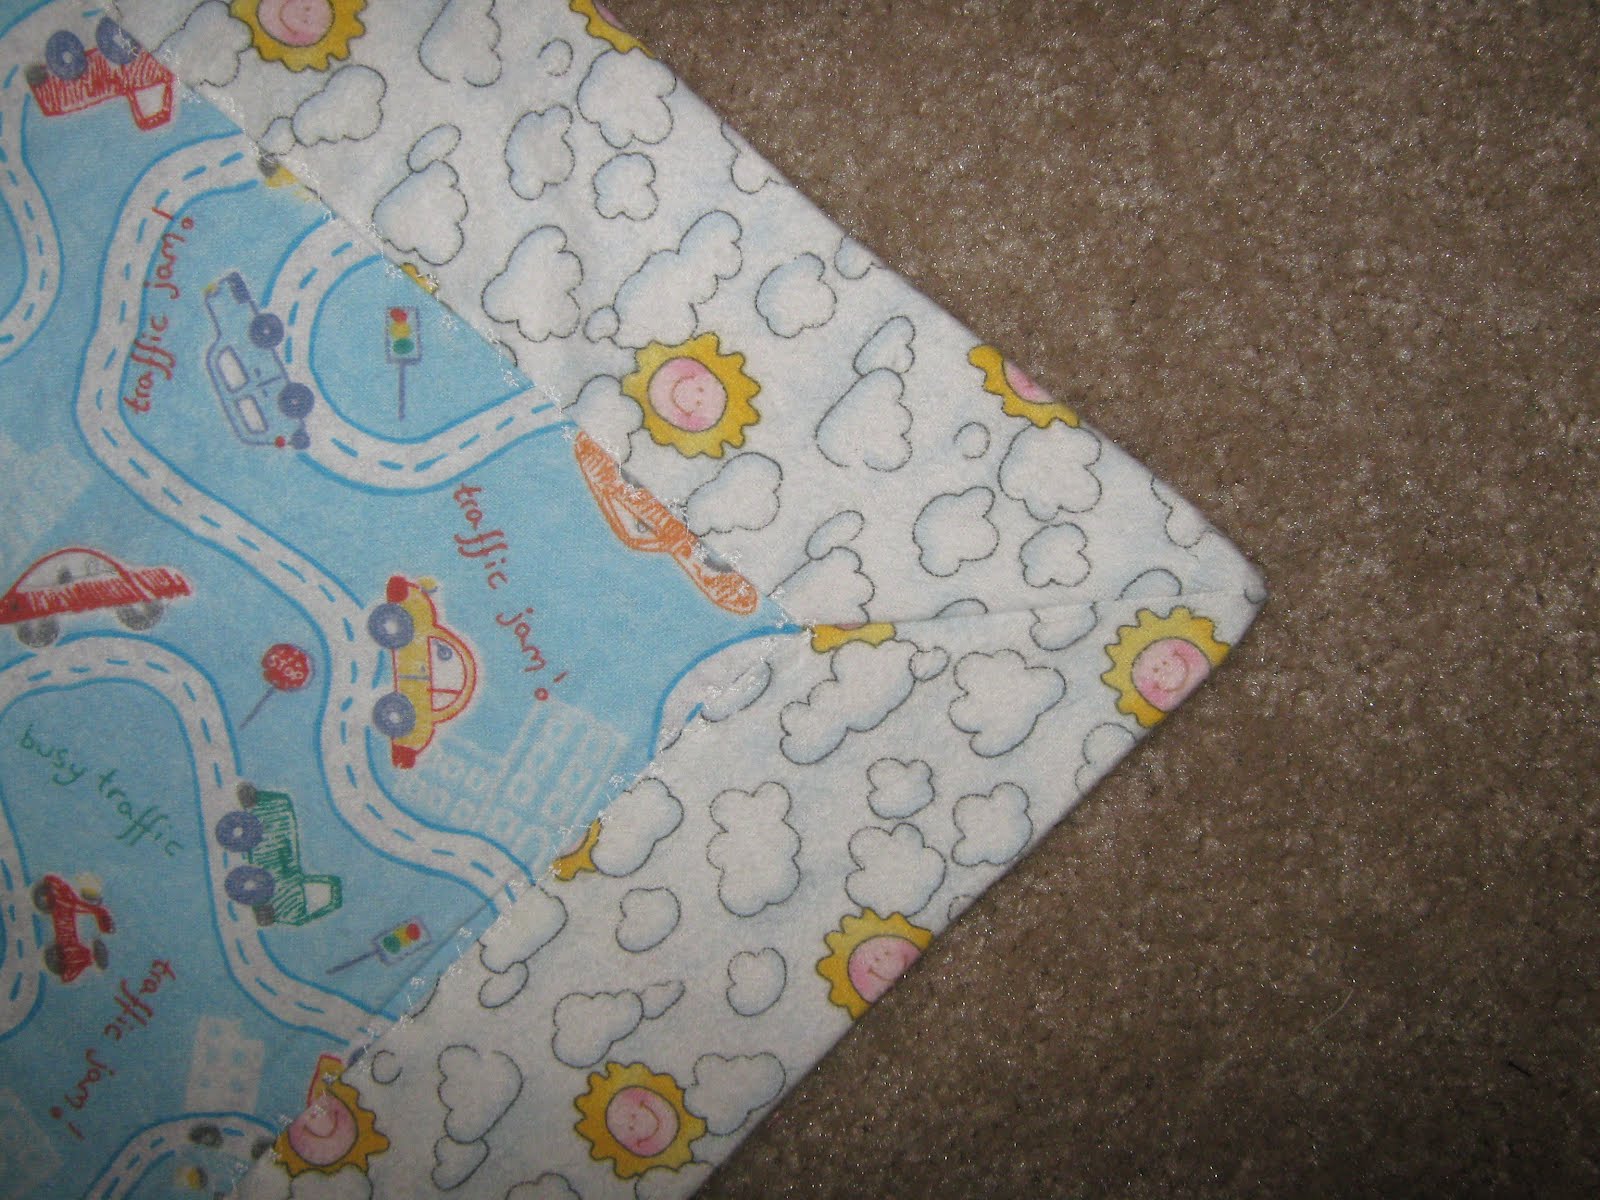
This one is using Patternista--I posted my Patternista star quilt top a week or so ago, so when that is finished, this will go on the bed with that quilt.

This one is Dogwood Trails, the quilt I just finished last weekend. Looks oh so pretty on the bed with the other things from the same line.
I happened to find a small collection of precut fabrics at our Tuesday Morning stores here in St. Louis. I hit several different locations, and each had a small amount of the same coordinates. I happened to luck out and get a jelly roll, a charm pack, a fat quarter bundle and 2 packages of 1 yard pieces of different prints in this set of coordinates. They were very inexpensive. I'm being forewarned by forum members that some of these cheap precuts (from Wal-Mart, I think) aren't worth the powder to blow them up with, so I'm not going to spend hundreds of hours making a quilt from this fabric, with the knowledge that it might not be something that will hold up to long and hard wear. So far, I have an hour invested in the combination, because that is how long it took me to make the pillow. I think I'll do an easy large block quilt to go with this. In the meantime, I really do love this coordinate, it reminds me of Easter Egg colors--very springy.

Hope you get a chance to try to make one of these pillows. They are fun and fast and handsome, I think. I just stuffed the first one as the tutorial suggested, but put a zipper in the next two, so I can take out the inner pillow to wash the cover. Hope this will work out, and you might try doing it this way if you make one and think it will get a lot of loving, and need to be washed. I used the trimmings of poly batting from some of my quilts, now I am very glad I didn't throw this away, because I filled three pillows for free! Whooppee! Let's go have a pillow fight!

Thursday, March 22, 2012

How many Tutes does it take to make a bed?

For those of us who log in to the Missouri Star Quilt Company forum on a daily (or hourly) basis, we know the value of tutorials that Jenny has presented to teach us quilting skills and simple projects that can turn out really great. I finished my Dogwood Trails bedding set and started counting up the tutorials or "tutes" that I used to complete this project--there are plenty of them.

Can you spot them?

In the quilt pattern and throw pillow--disappearing 9 patch blocks form the border around the large motif in the center of the quilt. The center heart is from a pattern in a book called "Super Simple Jelly Roll Quilts" by Alex Anderson and Liz Aneloski, published by C & T Publishing.


Latest tute--pleated pillow. Found a use for all those batting trimmings from my quilts that I didn't know what to do with, I stuffed the pillow with them. NOW I DO KNOW WHAT TO DO WITH THEM! Also in the pillows, heart block, tube pillowcases with borders, the borders are hard to see in this picture.

Binding by machine only, binding tool tutorial. I guess I did a good job with the binding tool (first time I had good luck!), because I can't even find where I joined the binding ends.

I do hate to hand stitch so in the entire bedding set, there is only 5" of hand stitching, that is to close the opening in the pleated pillow. Now, this is my kind of quilt making!

MSQC saved my project by having a small amount of the fabric line Dogwood Trail left in their stock. The most desired piece was the white background with white and pink dogwood flowers on it. This one was all sold out at the local quilt store where I got the rest of the fabric. MSQC also had a beautiful small multicolor flower fabric that I never saw at the LQS.

All this, plus encouragement from other forum members, FB friends, and some great books, and I think the Dogwood trail bedding is officially finished. Oh, I forgot, that last pillowcase in the back needs one more seam, then it is officially ready for my April bed!

Sunday, March 18, 2012

8 year old wisdom

The photo in this picture was taken in 2003, about 3 years before Ed lost his battle with brain cancer. He was diagnosed in 2004, and passed away in 2006.


In 2010, on our anniversary, which was April 4, I designed this little vignette, with Ed's picture when he was a little boy, and our picture from 2003. I always loved that picture of him as a kid, because he is holding an airplane. When he grew up and chose a career, it was in the military aircraft industry. The picture looks like one of our grandsons (my son's oldest) at the same age!

Fast forward to 2012.

As I was making my Dogwood Trails quilt this week, I decided to do some machine embroidery to make it more personal. I was babysitting my two grandchildren (not the same one as mentioned above), and my big boy MAC, who will turn 8 next Saturday, was very curious as to what I was doing. He was interested to see a sewing machine that could run by itself, and he was watching what the words were spelling out.

When I told him my idea for the four blocks, he had a different idea.

This one says our names.
This is our wedding date.
This is a personal message to my late husband, and to all my family.

And this one is the one the 8 year old thought I should change. He said, "It should say--You are here with us" because he reasoned that if we were thinking of Grandpa Ed, then it was the same as if he were here with us, not gone.

Now, can you beat that wisdom?


So, I need to embroider one more block, probably to put on the back of the quilt, with those wise words on them. Yes, Ed is in all of our hearts. We will think of you when your birthday comes upnext week on March 27. The kids will probably gather over at my house, expecting beef stroganoff for dinner, which was your favorite birthday food. We will think of you again on our anniversary, April 4. And so many other things remind us of you. Your tools in the basement, your personal items stored in special places in our bedroom, remembering your funny sayings, and that precious picture from 2003.

This is a nostalgic time of year for me. The rest of the year, I just kind of float along living my life as a widow, a single person, trying to make the best of it, and trying not to dwell in the past. But for the next few weeks, I'm going to indulge in nostalgic thoughts of the years we had together, and how much I do miss you and the life we shared for 42 years, my darling Ed.

Driven by Love

Have you ever started a project that you were driven to complete? I have, and this one really made me want to finish. It was driven by love--

---Love of quilting
---Love of fabric shopping
---Love of creating something beautiful out of raw materials
---Love of my dear late husband, who left us all and went to heaven about 6 years ago.


This is my Dogwood Trails quilt, created with love in my heart and remembrances of 42 years of married life to a man who loved nature, his job, working with wood, and his family. He also loved dogwood trees. So, as I said in an earlier post, when I saw this fabric, I just knew I needed to make something out of it.


It uses the heart block and Disappearing 9 patch patterns as borders for the main heart. I barely made it with the amount of backing I found, so perfect with rose petals with tiny sayings of love on them. I was short a bit, and had an uh-oh moment, one corner of the backing was too short, but I patched it and it is OK. This quilt isn't for a quilt show, it is for ME! And I don't care about that little mistake!


Mr. Kitty, Al, had to investigate the quilt, he did it within his usual 3 minute period of letting me take some pictures. He sniffed it and then jumped down, but I'll bet I catch him cat-napping on it more than once!


This is the pattern I used for the main heart in the center. I could have done 4 hearts, which was what the pattern suggested for a queen size quilt. But I wanted the heart to be in the center, and I wanted to use my charm packs for the D9P blocks, so I chose to do the single heart, with many borders around it.

I was driven by love to finish this quilt this weekend because this is the last day of my spring break, and I have lots of other things that need work in the sewing room in the next few weeks. I wanted to be able to use this quilt on my bed by April 4, which was our anniversary. I couldn't sleep much this week, I would drop into bed wearly from working on it late at night, then wake up uber early in the morning thinking about the next steps. Rather than fight to get back to sleep, I just went downstairs and worked on it. I started at 4:30 this morning, and finished it at 9, including pillowcses. I need some more fabric for some king size pillowcases for my real bed, this is the guest room bed, where all my quilts are previewed for size and shape.

I still need to clip some threads, but other than that and the big pillowcases, it is a done deal!

I do love this quilt, I love it so much that it might not just be the quilt of the month for April, but the quilt for all times! I am very happy with the results.

Some minor boo-boos, see if you quilters can find them. I'll reveal a major boo boo in another post!

Saturday, March 17, 2012

Shoud have had Sushi for dinner!

I posted a couple of days ago about my wonderful purchase of "Sushi" batik rolls from Missouri Star Quilt Company.

Another story of a day late and a dollar short, only this one is a day too soon!

They have all those sushi rolls on sale at a greatly reduced price as their Quilter's Daily Deal, and not only one day, but three days in a row!

Darn, jumped the gun too soon!

Patience is a virtue, of which I seem to have very little of!

Down the Dogwood Trail

For years, our house was known as the "house with the trees". Dogwood trees were the reason why it was known that way.

It started in 1966, when we moved to St. Louis into a little rental house. My new hubby had just started a job as an engineer with McDonnell-Douglas, (now Boeing), we had a little kid and we had moved into a new part of St. Louis--the north part. Many of our relatives equated visiting us with a trip to the "North Pole", because there were no interstates across town to speak of in those days. We had grown up in south St. Louis, and very seldom traveled to the north part of our metro area. We were in NEW TERRITORY for sure!

Hubby took a shine to growing things, something his mother and father did in their tiny yard, which was always immaculate. Not a leaf or stray blade of grass would stay in that yard, they took meticulous care of it. So, in our rental home yard, hubs decided to start to grow some dogwood trees from seed. I still remember the little coffee cans on the side of the house with the little pencil thin sprouts coming up! When we decided to purchase a home of our own, and the little sticks came with us.

Our new house was across the street from the parish church and school. After the little sticks were planted, they were subject to a lot of traffic threatening their very existence, especially when the parish picnic took place directly across the street from our bedroom! So many neighborhood kids would gather on our lawn to watch as they put up the rides and booths! But somehow those little dogwood sticks survived!

The trees grew and grew. Every spring, about 2 weeks after our anniversary, which was April 4, the trees burst into glorious white and pink. They were amazing, because for a tree that likes to live in shade, these dogwoods lived in full sun, and they thrived! They grew so big that they touched each other's branches, even though they were planted about 25 feet apart.

Life moved on, and so did we, sad to leave our beautiful dogwoods behind. We moved to the country where the dogwoods naturally lived in the forest. We walked and drove down the dogwood trail all those years, because there were plenty of them on our 160 acre plot of paradise! We tried and tried to transplant some woodland trees into our yard, but they never made it.

We moved back to the city, and by this time, hubby was ill with terminal cancer, and after his death, the girls wanted to plant a dogwood tree in his memory. We are on our fourth try to get one to grow, we lost three big ones, and last summer planted a little pencil, hoping it would take root and grow. It is showing minimimal signs of life this spring, maybe about 7 leaf shoots, but I am hopeful.

In the meantime, I'm making a quilt in memory of my dear Edwin, lost to us in 2006 after a 22 month battle with brain cancer. When I saw the "Dogwood Trail" fabric, I fell in love with it. My local quilt shop had most of the fabrics in the line, but not the white with the dogwood blossoms. Luckily, Missouri Star Quilt Company had a small bit of it left, and I got the last of it.

My quilt has hearts as the main motif. It is a combination of three different quilt patterns, so I had to do a lot of improvising. I'm not quite finished with it yet, but I have the basic top done, sans borders. I hope to get further on the project by the end of today. When I'm done, I'll proudly display it on this blog.


Here are the raw materials for the quilt, basic "Dogwood Trail" fabrics and coordinates. I started with 2 charm square packs (the only ones left at the quilt store) about 3 yards of coordinates, then more from MSQC, and some pretty pink backing. I embroidered our names, anniversary date and remembrances on several of the blocks, to make it more personal. I'm going to love it, even if it looks like a patched up hot mess!

P.S. My best friend lives on Dogwood Lane, I would love to live on a street named after our favorite tree!

Friday, March 16, 2012

I'm a woman, I can follow directions!

Or maybe not! Classic FAIL because I couldn't follow directions!
Not sure if even the dogs would want to sleep on this mess!
Here's my problem, relying on my not so great memory to miter this corner, rather than reviewing from the many online tutorials as to how to do it correctly. It could be a mattress cover!

Now, here's the way it is supposed to look. Came from "self-binding baby quilt" of which there are several (if not dozens) of YouTube tutorials on how to do it correctly. When I made the second one, at least I reviewed the directions as to how to miter the corner a couple of times, so as NOT to make two dog blankets.


Here's the mitered corner, as it is supposed to look.


My 6 going on 16 year old granddaughter is in first grade, and her teacher just had a baby. She was interested in making a quilt for her teacher's baby, so I thought, why not try out the Self-binding baby blanket, and I let her help me pick out fabrics, measure, cut and press. I did the sewing. I finished it up while she skipped off in her capricious way to do something else, and was so embarassed by the disaster I created.

I want to pass on to my granddaughter the love for sewing. I think this creative endeavor skipped a generation in our family, because my own girls have their "own" creative expressions, but it isn't sewing. Monkeygirl, #1 daughter is a paper crafter extroidinaire, and Daughter #2, M & M's mom, is a wonderful and creative cake decorator. So, they have talents and use them. But the sewing machines I've given them are dusty, and in one case, given back to me because of lack of space for storing them. (She uses that as an excuse as to why she can't sew!)

So my hope is my grandchildren, which out of 6, I have one girl. Oh, and one darling great-granddaughter, who has many grandmas and great-grandmas, maybe one of us will teach her to sew someday!

My granddaughter has shown an interest in sewing, and we've purchased a succession of toy to real sewing machines for her to learn on. The first one was a disaster, because it was impossible to thread, it had a shield around the needle so the kid wouldn't get her fingers sewed. Great safety feature, but I could never rethread the thing. And of course, the first thing she wanted to do was change the thread color! That one entertained her when she was 4 because she liked to press the foot pedal and see the needle go up and down.

On to the next adventure. We went from a $25 toy to a $50 cheapie. It sewed exactly 4" and then would never sew another stitch. So back to the store it went.

Next, I found an inexpensive light, small Janome on sale at Hancock for about $80. I've used it and it sews fine. It has a nasty habit of unthreading the needle if you don't have a long trail of thread under the presser foot, which could be problematic for a youngster just learning. This little girl has a low threshhold for frustration, so I can see this being a problem.

But, Grandma had to take it one step further. Janome makes a "Hello Kitty" line of sewing machines. The price point starts around $100, and in the line of three different machines, each successive one is about $100 apart. I opted for the least expensive one.

To really begin motivating her, I found fabric from the Hello Kitty line to make her a comforter, and she spotted that in the UFO pile yesterday when I was babysitting her. What she didn't spot was the Hello Kitty sewing machine that had been delivered while she was at my house playing in the basement, and I managed to sneak it in the house and hide it. I want the comforter and the sewing machine to be a "grand opening" event! I don't know if I'll wait for her 7th birthday, which is this summer, but maybe I will. I ordered some more Hello Kitty fabric, maybe cutting that into charm squares and letting her sew them together for her own quilt will be an incentive to start to sew, just like Jenny Doan did with her 7 year old granddaughter.

By the way, I also realized after I ordered the Hello Kitty machine that it is the exact same machine as the cheap--NO, INEXPENSIVE Janome I already have! Oh well, Grandma and Granddaughter can sew side by side using the same machines! The extra cute blue paint on the Hello Kitty machine was an extra $30, but what the heck, what are grandmas for if not to indulge and spoil their grandkids?

Tuesday, March 13, 2012

Hello kitty!

Coming soon, to the SewWhat? blog, a story about "Hello Kitty" with pictures!

For all you cat loving quilters out there


To quote Jenny Doan, our fearless leader--"How Cute Is this?"

I think I saw this on someone's album, so I know it isn't anything that hasn't been tried by this group, but I just found it again. I had seen it with the tails not quite so intertwined, or tessalated, as the mathematicians call it. Or, I've seen it with just two cats together, not four. In the original design, which is called "Kool Kats Kwilt" by Patti Carey for Northcott, she has about 30 cats intertwined on a lap quilt.

Like a cheap fool, I tried to figure out how to do this by looking at someone's picture and not buying a pattern. You think I would have learned my lesson after the "Stars Aligned" and realized that I would never be able to calculate those sizes by myself. I finally got the concept and had it drawn out correctly. But figuring out the size of each triangle and square was going to be my undoing. So--GOOGLE is our friend, and I looked for it on the internet and found it. In Patti's design, the groups of cats nestle in the corners where there is plain black on my picture. After my experience intertwining the stars on the last queen size quilt, believe me, if I continue this, I'll make a lap quilt. After all, it will be for the cat as he lounges in my lap for our afternoon naps! And the pattern is free!

What do you think--how cute is this?

I did a terrible job of measuring on my first try--my cats aren't as wide as they are supposed to be. Guess my eyes are wearing out from all the measuring and 1/4" seaming I've been doing the past 4 days. But the cats work and I can make them work if I want to carry on with this same theme and fabric..

The directions are in PDF format online, you can download them from her website...0

Monday, March 12, 2012

And a Partridge in a Pear Tree!

My shopping rounds today included my favorite fabric haunts, Hancock and Jo Anns, plus two others, Tuesday Morning and Hobby Lobby. My "plan" was to find fabric for the upcoming plays I'm costuming. I did do that, but.......

I was ba-a-a-a-a-d! But coupons made the pain on the credit card a little easier to bear.

Here's my pile of stuff!
12 fat quarters
10 patterns
6 1/4th yard pieces
5 fabric bundles
5 quilting stencils
4 yards of Kona Cotton
3 bolts of batiks (backing for my quilts)
3 jelly rolls
3 Panels and backing to practice my FMQ with
2 apron kits
2 yards of rainbow plaid
and a simple jelly roll quilt book!


You thought I'd sing, "...and a Partridge in a pear tree!" I guess that would have fit this list! It was fun, and my stash is now even bigger than before. I'd better do some cleaning out of non-essential stuff to make room for all this new stuff. I can hardly wait to dig into the new projects! This spring break isn't going to be near long enough!

I had Sushi for lunch!

After a morning at the sewing machine, trying to get my Patternista Star quilt further along to the finish line, I quit about 11, having had enough for the morning. I was starving, my peanut-butter banana had long since worn off.

My mailman usually comes to deliver the mail some time before noon. It was just about noon, I was ready to go out for some lunch and a round trip through the fabric stores (more on that later!), when he drove up, carrying boxes from MISSOURI STAR QUILT COMPANY! I had lost my resolve to not purchase more fabric from them until I was done with other projects. OK, I was nearly finished with one project. So their Sushi Rolls of batiks were more than I could stand. (Deal of the Day on Friday?) Where could you stop, which one would you not purchase? I'm not a real fan of tans and browns, so I didn't order that one. I had 5 ordered, and it came to 99.75--so the free shipping if you are over $100 made me buy one more.

So, here was my lunch for today!

'
I love batiks, I could make every quilt out of them and be happy. I love the variety of patterns, the colors, the yumminess of the mixture of colors. So, I guess I went a little hog wild, and ordered these 6 rolls. They all go together, I can mix and match and use them in a variety of quilts that I have "on my bucket list". It should be fun to create with these beautiful fabrics.

Sunday, March 11, 2012

When you Wish Upon a Star....

Crazy as I am, stars fascinate me! When I was teaching in elementary school over 20 years ago, I was known by my love for astronomy, stars, and space. I was the "Miss Frizzle" (of Magic School Bus fame) of my school. I even put glow in the dark stars on my classroom ceiling, so when we turned the lights out, the students could view the Big and Little Dipper and stars surrounding them! Even though I don't teach elementary school anymore, I still have a love for stars.

When I started to get serious about becoming a quilter, I saw a quilt in a magazine about a year and a half ago, and said, "That's the quilt I'm going to make next!" It took 75 different batiks to make and it was all stars, on point, to make 72 beautiful Ohio Stars, with the other three fabrics as the border and setting triangles. Little did I know what I was about to get into.

I had a blast finding the 75 batiks. I know I went a bit overboard, because I had way more than 75 in my stash to choose from. I went with the teal/purple color scheme, my favorite for decorating!

Next was the mammoth job of cutting! Because of the size and shape of the pieces, it couldn't use precuts, just fat quarters, so I had to cut all the star parts myself. I think there are at least 13 parts for each star.

Here's the pattern.


Here is my progress so far, all cut and sorted, ready to begin the sewing process.

After making the "Stars Aligned" project, I'm not so sure I'm ready to tackle this one just yet. My original plan was to make a few blocks at a time, and I think that is a good plan. This will be a WIP for a long time!

In the mean time, I have other more pressing projects on my mind! Like "Dogwood Trail" that I would like to finish by April 4. Dogwood trees were my late husband's favorite tree, and we were married April 4, 1964. It would be a nice anniversay memory for me to have that quilt on my bed, thinking of him and how beautiful the dogwood trees that he planted looked during April.


Or, I could work on this. I found out that Janome sells three different models of "Hello Kitty" sewing machines. I just ordered one for my granddaughter to use as her first machine. Found this darling fabric today while at the fabric store, I just had to get some!


Right now there are 3 layers of UFOs on my guest bed, two jelly roll quilts and the Patternista stars. I'm hoping this week during spring break I can get to finishinig at least one of them, and start on the Dogwoods. Plus make several costumes for upcoming plays in April. It is going to be a busy week!

Patternista Progress!

This weekend was busy, but the major thing I accomplished was putting together my quilt top using the fabric line Patternista. This was something I saw on line from Missouri Star Quilt Company which caused a bit of controversy among the quilters who saw the line when it first came out.

Some hated it--said it made them sick, nauseated to work on, not my style.....

Others gushed about how beautiful it is! I am one of the gushers!

I love this line of fabric! I also love the pattern, which is called "Stars Aligned".

I had 30 of the 50 star blocks made about a week ago, but couldn't for the life of me figure out how to add the other 20 stars to make them "align"! Fellow online quilting community members tried to help, showed me pictures, but I must be dense because I didn't get it. I needed the pattern to finally show me how it went together. That came last Saturday.

As I whined about in my last post, I didn't actually get to do much in the way of quilting this past week. My daughter had a babysitting crisis, needing grandma on call, and I had tons of papers to grade and grades to compute before my spring break could actually start. That chore wasn't officially over till about 2 p.m. Friday. Of course, then it was time for a nap!

But I got going early Saturday morning. Sleep had eluded me by 4:30 a.m., even though I had only been between the sheets for about 5 hours. I just had to start putting my blocks together, so I couldn't sleep!

The stars go together by using three parts of the other 20 stars as sashing. The vertical points of the stars are sashing between the main blocks, and the horizontal points of the stars are sashing between the rows of blocks. You have to build this slowly and carefully, to make sure you get the right vertical point with the same horizontal point. I was about 2/3 done on Saturday when the body said "Enough!"

So here it is, the top is all pieced together. I think it turned out very well, and oh, so pretty! It is bright, to be sure! I need to make a black border and perhaps add an outside border of one of the prints from yardage, then really make my pillow cases.
Like most nosey cats, my boy Al had to jump on the quilt to make sure it was fitting for his lounge pad, he gave me about 3 minutes to take the picture before he was on it.

No, this quilt does not come from a pet-free home! Recipient (at this point it is unknown) will just have to deal with fur. In the meantime, I am sort of proud of this quilt because it has the most detail of any I've done so far, and most of my points do match up, not all, but most of them! I got better as I got closer to the top,catching on to how to make it all go together more smoothly.

Now, any suggestions as to how to quilt this beauty?

Friday, March 9, 2012

It's not fair!

Being an English teacher, today I have a whole stack of papers to grade so I can post my midterm grades and get on with SPRING BREAK! The teachers look forward to it as much as the students do! But it's not fair! I haven't been able to work on my quilt much this week. Hope I can get some done next week!